
Password leak check in Mendix using HIBP
Checking if a user's password has been in a leak is easy with the Have I Been Pwned API, but how easy is it to implement the API in Mendix?
Introduction
If a user is not using a password manager (which they should be), it is very likely that they are reusing the same password over and over, so that they don't have to remember a lot of different ones. But what they might not know is that their "super secure" password may have been in a password leak before. If it has it makes it very easy to breach their account. The wonderful Have I Been Pwned website allows users to check if their email has been leaked in a data breach, but it also has the ability to check if a specific password has appeared in a leak before. I implemented the API to do these checks in .Net many years ago and wondered how easy it would be to do the same in Mendix.
Design
You can read the full API documentation here, but the important things to note is that the endpoint is free to use and that it does not require you to give them the actual password, just the first five characters of the password's SHA-1 hash. Troy Hunt gives an excellent overview of the privacy and anonymity provided by the API in this article.
To generate the SHA-1 hash for our string, I decided to use the Google Guava library in a Java Action. Then all that remains is to call the endpoint and process the response in a microflow and finally provide the user with feedback if their chosen password has been found in a leak.
Java Action
Generate SHA-1 Hash for a String
Start by grabbing the Guava jar file from the Google GitHub repository and dropping it into the userlib folder of your Mendix project. If you are using the Community Commons module then you already have the required file.

Open your project and create a new Java Action that takes a string as a parameter and returns a string.

The code to generate the SHA-1 hash is below.
@SuppressWarnings("deprecation") // Yes, SHA1 is deprecated and shouldn't be used but the API we want to interact with requires a SHA1 hash
HashCode hashCode = Hashing.sha1().newHasher()
.putString(StringToHash, Charsets.UTF_8)
.hash();

String hash = BaseEncoding.base16().lowerCase().encode(hashCode.asBytes());
return hash;
The code creates a new SHA-1 hasher and provides it the string parameter that is passed to our Java Action, then it converts the HashCode we received to a Base 16 value before returning it.
Microflows
Leak Check Microflow
Create a new microflow that can be used to check if a password has been in a leak. The basic layout of the microflow is as follows.

As parameters we pass in a Boolean that defines what should happen if the API cannot be reached or returns an error (it shouldn't, but you never know) as well as the AccountPasswordData entity which makes it easy to integrate our logic into the existing password check microflows later. We start by generating the SHA-1 hash of our password and then proceed to set up the URL for our API call.

We create the endpoint by simply appending the first five characters of our SHA-1 hash to the appropriate URL. The endpoint is case insensitive so we can pass it as is.
Setting up the REST call is trivial, simply set the location of the call to the endpoint created above, then set up the response like this.
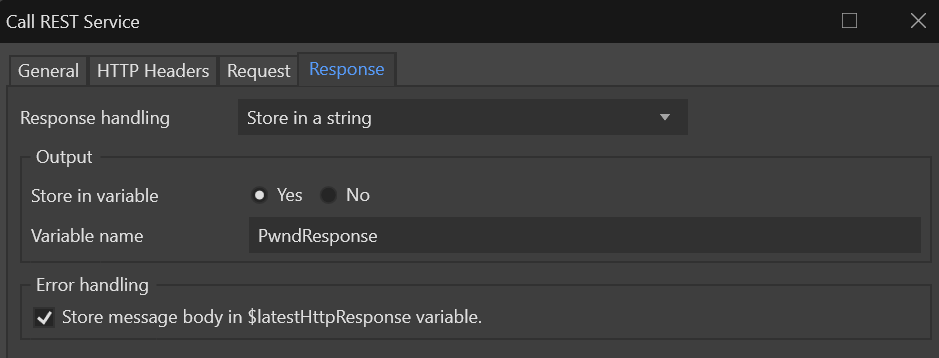
The API responds with a string containing the SHA-1 suffixes for the prefix we provided as well as the number of leaks they have appeared in, so for our next step we will get the suffix of our SHA-1 hash.

Finally we check if our suffix appears in the list of responses we received.
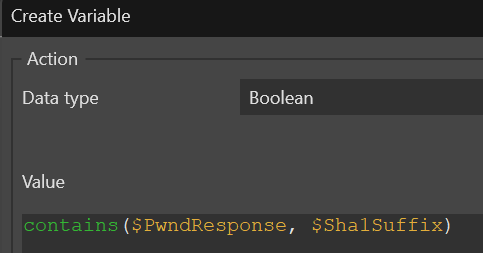
Based on the value of the above we can notify the user that their password was in a leak or allow them to continue as it hasn't been.
The error handling for our REST call is fairly straighforward, based on the value of the FailOnApiError we will either allow the user to continue with the change even though we couldn't reach the API or we will fail the update request with an appropriate message asking the user to try again.
Integrate With Account Admin
To make it easy to use the password check microflow with the Mendix account administration logic I created a microflow for each of the microflows on those pages.
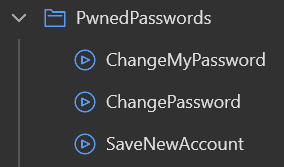
In this way we do not need to modify the Administration module besides replacing the save microflows with our own. Below is the layout of the SaveNewAccount microflow replacement.

The microflow takes the AccountPasswordData entity as a parameter so it can simply function as a drop-in replacement. It starts by grabbing the settings that indicate if we should prevent a password change if the API is unavailable and then proceeds to call the sub-microflow defined above. If the password has not been leaked we proceed to save the account, otherwise we do nothing as a message is displayed to the user in the sub-microflow. Note that the microflow must have entity access enabled as the SaveNewAccount microflow has it enabled. The other two flows work similar to this one and is left as an exercise for the reader.
Conclusion
Checking if a password has been leaked as part of a data breach is secure, free and easy thanks to the Have I Been Pwned API. It is also an easy way to help protect your applications and users, knowing that weak, leaked passwords are not being reused.